Scanning
Scanning Guide
The UV-K5 can scan frequencies continuously, scan through memory channels, and automatically identify CTCSS/DCS tones on an active channel.
Frequency Scanning
Frequency scanning steps through a range of frequencies looking for active signals. The step size is taken from the Step menu setting.
- Start scan:Long press the
UPorDOWNarrow, or long press*in VFO mode. UP starts scanning upward, DOWN starts scanning downward. - Stop scan:Press any key or PTT. The radio pauses on the last frequency where a signal was found.
- Direction:The arrow key used to start the scan sets the initial direction. During scan, pressing UP or DOWN changes direction.
- Step size:Set in the
Stepmenu item. Smaller steps find more signals but scan more slowly. 12.5 kHz is standard for VHF/UHF land mobile. - Status bar indicator:
SCAorSCBappears in the status bar while scanning VFO A or B.
Channel Scanning
When in channel mode (MR), the scanner steps through memory channels rather than raw frequencies.
- Start:Long press
*in channel mode, or long press UP/DOWN arrow. - Scan all channels:By default, the scanner visits every populated channel slot (0–199) in order.
- Scan selected list:If
SListTis set to List1 or List2, only channels in that list are scanned. - Skip channel during scan:Remove the channel from the scan list, or remove it from List1/List2 if using selective scanning.
Setting Up Scan Lists
Scan lists let you create curated groups of channels for faster, focused scanning. The radio supports two independent scan lists.
| Step | Action |
|---|---|
| 1 | Navigate to the channel you want to add (channel mode) or tune to the frequency (VFO mode) |
| 2 | Open the menu and find ScAdd1 or ScAdd2 |
| 3 | Set to ON to add to that scan list, OFF to remove |
| 4 | Repeat for each channel you want in the list |
| 5 | In the SListT menu item, select List1, List2, or All to choose which list is used when scanning |
Scan list indicators on display
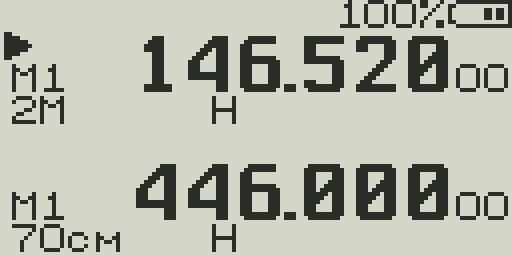
When a channel is in Scan List 1, a 1 icon appears on VFO line 1. Scan List 2 membership shows a 2 icon. Both show when the channel is in both lists.
Priority Channels
Priority channels are checked more frequently during scanning. While scanning a list, the radio briefly checks the priority channel and returns to scanning if nothing is heard.
- Set
SList1in the menu to a channel number to designate it as the List 1 priority channel. - Set
SList2for the List 2 priority channel. - Set to
OFFto disable priority checking for that list. - Use case: set a calling frequency or emergency channel as the priority so the scanner always checks it between other scanned channels.
Scan Resume Modes
Set via ScnRev in the menu. Controls what happens when the scanner stops on an active frequency.
| Mode | Behavior | Best for |
|---|---|---|
| Timeout | Stay on the active frequency for a fixed time (~5 seconds), then resume scanning regardless of signal | Busy frequencies; prevents scanner from locking up on a persistent signal |
| Carrier | Stay on the active frequency until the signal drops, then resume scanning | Intermittent traffic; ensures you hear the full transmission |
| Stop | Stop scanning and stay on the active frequency until you manually restart the scan | Finding a specific signal and monitoring it |
CTCSS/DCS Tone Scanning
When you find an active frequency but don't know the CTCSS or DCS tone being used, the radio can scan through all tones automatically to identify it.
- F + 4Start CTCSS/DCS scan on the current receive frequency. The scanner tries each CTCSS tone (67.0–254.1 Hz) and each DCS code, listening for the squelch to open.
- F + *Alternative shortcut for CTCSS/DCS scanning on some firmware builds.
How tone scanning works
- Tune to the frequency with an active signal.
- Press F+4 to start tone scan. The display shows the tone being tested.
- The scanner sets each CTCSS/DCS as the receive filter and listens for 0.5–1 second.
- When the correct tone is found, the squelch opens and the scan stops.
- The identified tone is displayed. Press MENU to apply it as the RxCode for this channel.
Scan Ranges (ENABLE_SCAN_RANGES)
When scan range support is compiled into the firmware, you can define custom frequency boundaries using VFO A and VFO B as the lower and upper limits.
- Set VFO A to the lower bound of the range you want to scan.
- Set VFO B to the upper bound of the range.
- Enable scan range mode (firmware-specific activation — check the configured key assignment).
- The scanner stays within the defined A–B range rather than wrapping the full band.
- This is especially useful for monitoring a specific sub-band (e.g., 144–148 MHz amateur VHF only).
Integration with spectrum analyzer
When scan ranges are defined, the spectrum analyzer can also respect those boundaries, showing only the defined range. See the Spectrum Analyzer Guide for details.
Tips for Effective Scanning
- Reduce step size for more thorough coverage. 12.5 kHz finds narrow-band signals that 25 kHz might skip over.
- Use Carrier mode (
ScnRev = Carrier) when you want to hear complete transmissions. - Use Timeout mode on bands with continuous data transmissions (e.g., APRS, pagers) to prevent the scanner from locking up.
- Lower squelch before scanning if you want to detect weak signals. High squelch will skip marginal signals.
- Scan lists are faster than scanning all 200 channels. Build a list of your most-used or most-active channels for daily monitoring.
- Use the spectrum analyzer first to visually identify active frequencies in a band, then switch to scan mode for those specific areas.
- CTCSS-filtered scanning: Set an RxCode to hear only transmissions with your tone. The scanner will skip signals on your frequency that use a different tone.