Getting Started
Getting Started with UV-K5
What's Different in rfsplatter Firmware
rfsplatter v0.1 is based on the egzumer fork of the open-source Quansheng UV-K5 firmware. It includes all egzumer features (spectrum analyzer, AM fix, wide RX, SSB/USB reception) plus several additions specific to rfsplatter:
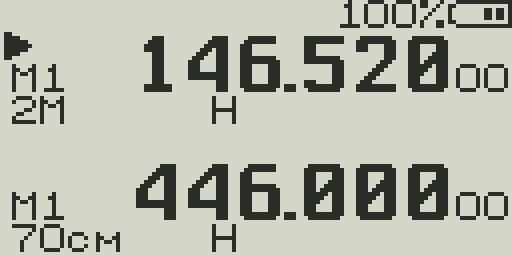
- Band labels on VFO display — The VFO info line shows a short band name (2M, 70cm, AIR, SW/6M, VHF+, 350, UHF+) based on the current frequency, making it easier to know your operating band at a glance.
- Radio-to-radio text messaging — A built-in messenger lets UV-K5 radios exchange short text messages over FM frequencies using FSK. Supports T9 input, broadcast (CQ) mode, and directed messages with automatic acknowledgment. See the Messaging Guide.
- Custom splash screen — Upload your own 128×64 monochrome image at rfsplatter.com/build and it will be compiled into the firmware and shown at boot.
- RFSPLATTER v0.1 branding — The boot screen and version string identify the firmware as RFSPLATTER v0.1, distinguishing it from stock or other community builds.
- Based on egzumer fork — All egzumer features are included: spectrum analyzer, AM fix, wide RX (18 MHz–1.3 GHz), SSB/USB reception, improved scanning, DTMF decoding, and more.
What is the UV-K5?
The Quansheng UV-K5 is an inexpensive handheld transceiver covering 50 MHz – 600 MHz. It transmits on VHF (136–174 MHz) and UHF (400–470 MHz) and can receive across a much wider range, including AM aircraft band (108–136 MHz), FM broadcast (76–108 MHz), and more.
rfsplatter firmware replaces the stock Quansheng software with a community-developed alternative that adds the spectrum analyzer, extended receive coverage, USB/SSB reception, improved scanning, DTMF decoding, a flashlight, and dozens of other features — all configurable from rfsplatter.com.
Powering On & Volume

- Power/Vol knobRotate clockwise to power on. Continue rotating to increase volume. Rotate counter-clockwise to decrease volume; turn past minimum to power off.
- VolumeAdjust the knob at any time during normal operation. The audio level indicator on the center bar shows the current level during TX.


Display Layout Overview
The display is split into five zones from top to bottom:
| Zone | Contents |
|---|---|
| Status bar | TX/RX indicator, scan mode, dual watch, VOX, key lock, F-key active, battery level |
| VFO A — line 1 | VFO marker (▲/▼), TX/RX icon, channel number or frequency, scan list icons |
| VFO A — line 2 | Modulation (FM/AM/USB), power (L/M/H), offset, reverse, bandwidth (W/N), DTMF, scrambler, signal bars |
| Center line | RSSI bar with dBm + S-unit, audio bar during TX, DTMF decode, charge level during charging |
| VFO B — lines 1 & 2 | Same layout as VFO A |
See the Display Guide for a full breakdown of every icon and indicator.
VFO Mode vs Channel Mode
The radio operates in one of two modes per VFO:
- VFO Mode — Displays a raw frequency. You can tune directly by entering digits on the keypad, change steps, and adjust modulation, power, and tones freely. Changes are temporary.
- Channel Mode — Recalls a stored memory channel (0–199). All settings (frequency, name, tones, power, scan lists) come from the channel. Great for programmed repeaters and nets.
Tuning by Frequency Entry
In VFO mode, type a frequency directly on the numeric keypad. The radio accepts digits as you type and jumps to the frequency when all digits are entered.
- Enter
1 4 6 5 2 5to go to 146.525 MHz. - Frequencies are entered in MHz with implied decimal: 6 digits total for MHz (e.g., 146.525) or 7 digits for kHz (e.g., 446.000).
- Press
EXITto cancel an in-progress entry. - Use the up/down arrow keys to step through frequencies in the current step size.
Band Selection
Quickly jump to the start of a band using the band shortcut.
Switching Between VFO A and B
The radio has two independent VFOs — A (upper) and B (lower). The active VFO (shown by the triangle marker ▲ or ▼) responds to tuning, scanning, and transmit actions.
Basic Transmitting
- Press and hold
PTTto transmit. The TX indicator appears on the display. - Release
PTTto return to receive. - Transmission requires: sufficient battery, no active TX lock, frequency within an allowed TX band.
- Power level is shown in VFO line 2: L (Low), M (Mid), or H (High).
- Quick-toggle power with
F + 6.
See the Transmission Guide for repeater setup, CTCSS/DCS, VOX, and TX restrictions.
Basic Receiving
- The radio monitors the active VFO frequency continuously. When a signal breaks squelch, audio plays through the speaker.
- The center bar RSSI graph shows signal strength in real time even when squelch is closed.
- If you hear nothing on a busy frequency, the squelch may be too tight. Lower it via the SQL menu item (0 = open, 9 = tightest).
- For weak or marginal signals, try squelch level 1 or 0 (open squelch).
- For aircraft, switch to AM modulation. For amateur SSB, switch to USB mode.
See the Reception Guide for modulation modes, AM Fix, Dual Watch, and S-meter details.